The opening experience for the consumer is dependent on the closure application to the bottle. Good closure application requires the bottle to be held stationary, the closure to be held securely in the chuck, and the closure being directly over the centre line of the bottle when applied.
It is important that you regularly check and service your capping chucks.
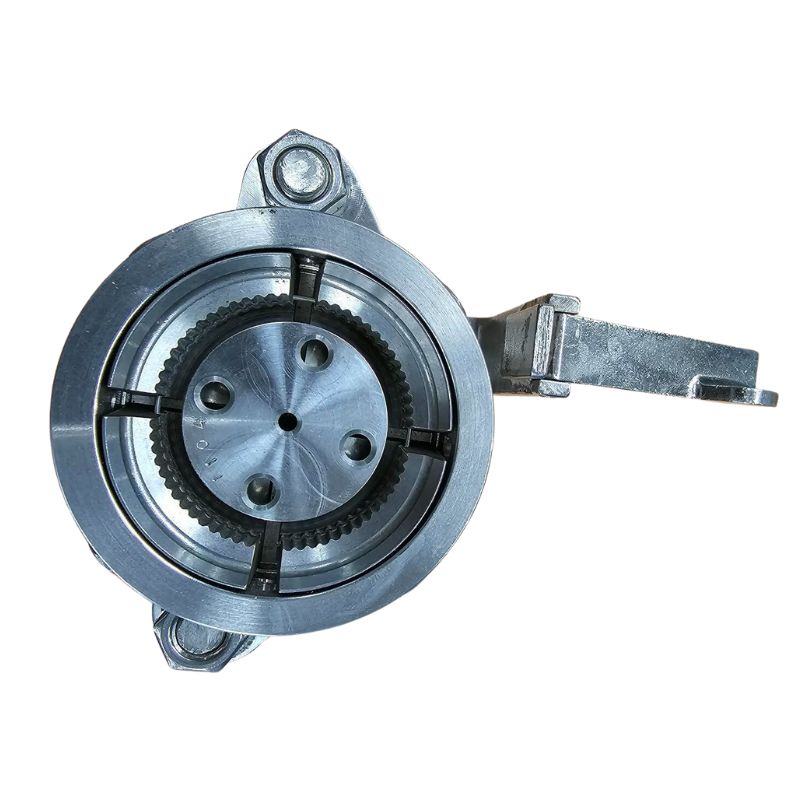
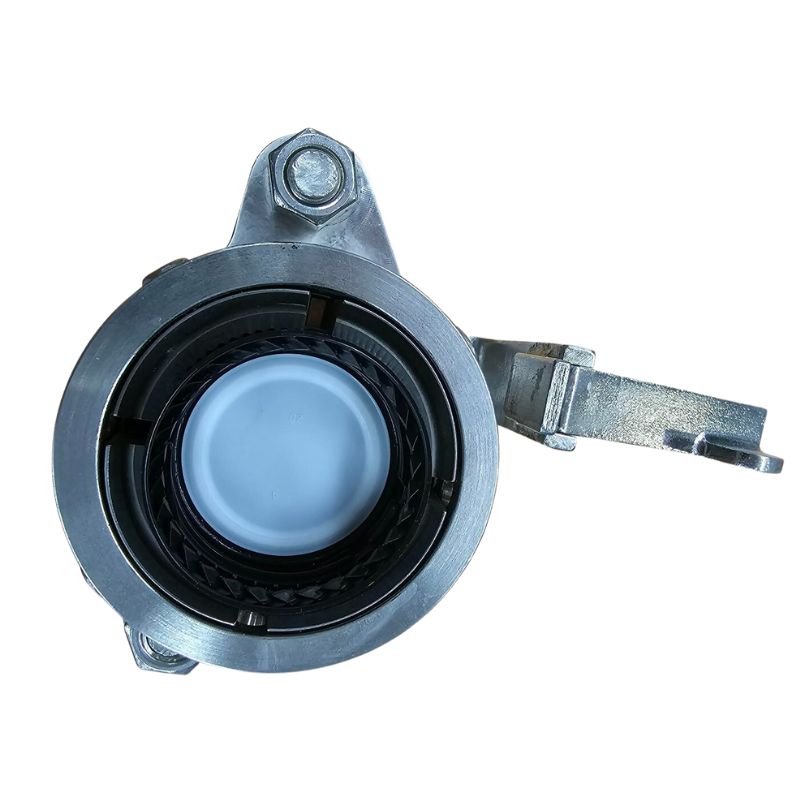
There are generally two types of chuck systems - termed “fixed” chuck and the more complex “articulated” chuck.
The fixed chuck is basically a cylinder of metal with the exact shape and knurl of the outer cap machined from the cylinder. They then have a series of holes almost drilled all the way through the chuck wall (commonly 4) that are each fitted with a small ball bearing. A strong “O” ring is then fitted over the outside of the chuck to apply even pressure on each ball bearing. As the chuck moves down directly over the cap, these ball bearings move back but then grip the closure when fully fitted in the chuck.
When servicing these chucks, you will need to disassemble them, check they are clean and that there is no build-up of product preventing the ball bearings moving freely. This is particularly important for hot fill products and sticky products. Then check each “O” ring to ensure there are no cuts or knicks in the bands. It is often good to have several sets of these “O” rings with different strengths so that if you even get a different batch of caps (particularly if you start a new colour) that the outer size may vary so a different strength “O” ring may be required.
The articulated chucks generally have three or four separate jaws. They will still have a knurl on the face of each jaw that will need inspecting for wear and damage. These jaws will move down over your closure in the fully open position. There is some form of mechanical sensing device inside these chucks that once it touches the top face of the cap, will drive the jaws to close tightly on the closure. Usually, they will have an adjustable metal spring that sets the pre-load on the chucks. Once the chucks are fully cleaned and lubricated, you should check the springs are all giving the same tension on each chuck.
The important step, once you have serviced your check, will be to use a torque wrench fitted with a puck that exactly fits the chuck then measure the force to get each head to slip. They must all be an equal setting. Then run your machine at full speed and measure the removal torque from each head at the same time after capping to ensure your achieving your specific removal torque for each head.
Additionally, depending on the complexity of your capping line, you may need to check the cam profiles, sprocket condition and chain tensioner are also all in good condition and no opportunity for the chain to slip a tooth when running. Most machines will also have some form of adjustable clutch per head that then sets your on torques.